
Balcony Composting Without Smell
Balcony composting without smell may sound difficult, especially when you live in an apartment or have neighbours close by. Nobody […]
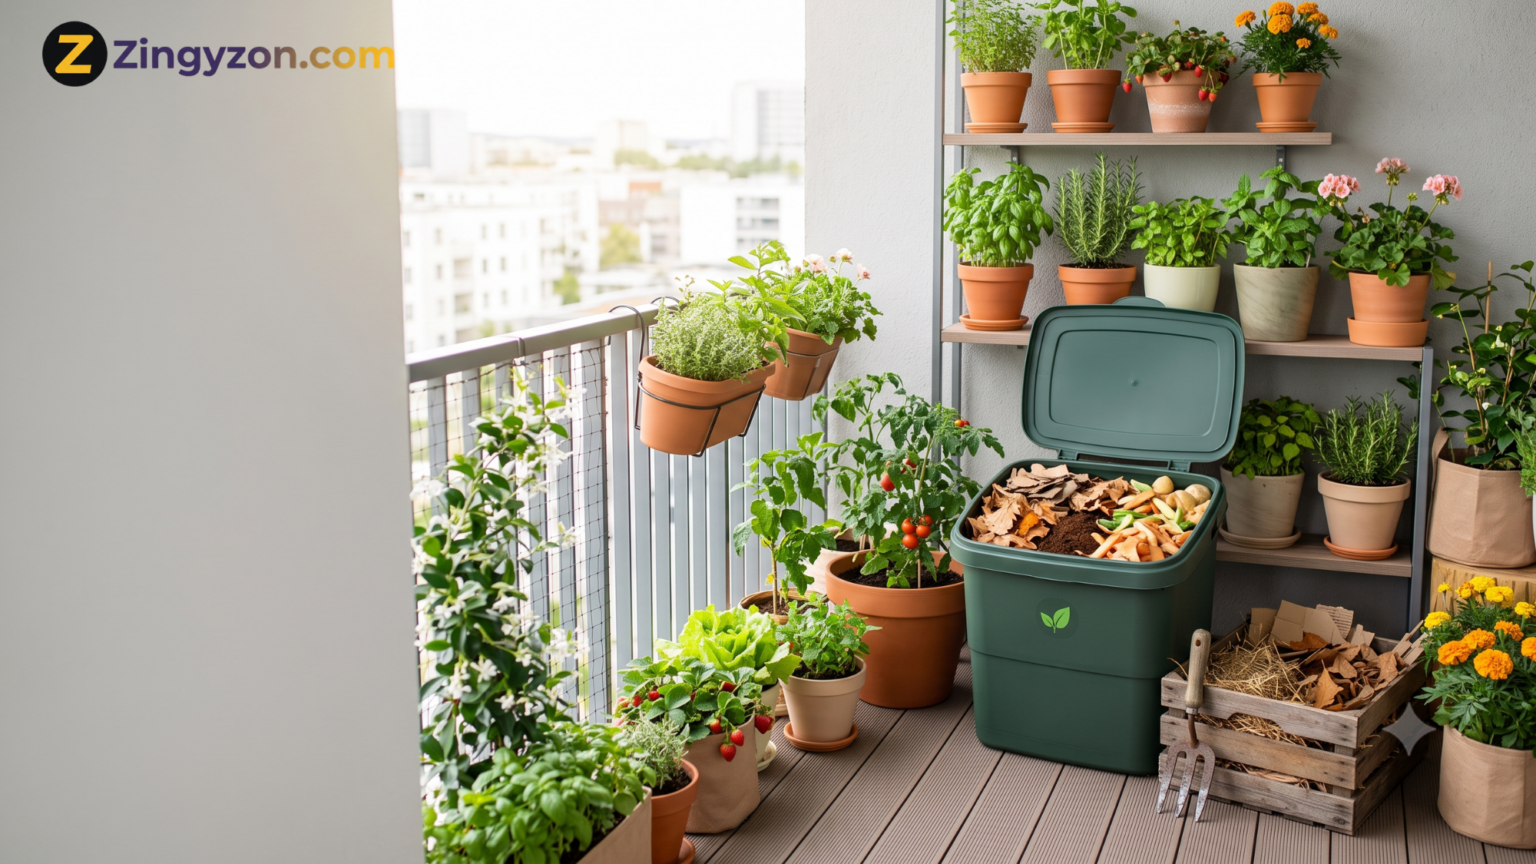
Balcony composting without smell may sound difficult, especially when you live in an apartment or have neighbours close by. Nobody wants rotten-food odours, fruit flies, leaking liquid, or complaints coming from the next balcony.
The good news is that properly managed compost should have a mild, earthy smell rather than an offensive one. Bad odours normally appear when the compost contains too much wet food waste, too little dry material, or insufficient airflow. By selecting the right container and balancing your ingredients, you can turn everyday kitchen scraps into useful compost without making your balcony unpleasant.
This guide explains how to set up a clean, compact, and low-odour composting system that works in limited outdoor spaces.
Can You Compost on a Balcony Without Smell?
Yes, you can compost on a balcony without creating a bad smell. The key is to:
- Use a ventilated container with a secure lid.
- Add more dry brown material than wet green material.
- Cover every new layer of food scraps.
- Keep the mixture damp but not soaked.
- Mix or turn the compost regularly.
- Avoid meat, dairy products, oil, and cooked foods.
The Environmental Protection Agency recommends using approximately two to three times more brown material than green material by volume. It also advises covering food scraps with a thick layer of dry material to reduce odours and discourage pests.
Why Balcony Compost Starts Smelling
A compost bin does not become smelly simply because food scraps are decomposing. Offensive odours usually indicate that the composting conditions have moved out of balance.
Healthy composting is mainly an aerobic process, meaning the microorganisms responsible for decomposition need oxygen. When a bin becomes compacted, excessively wet, or overloaded with kitchen waste, oxygen cannot move through the material properly.
The contents may then start decomposing under low-oxygen conditions, producing sour, sewage-like, or rotten-egg smells.
Too Many Green Materials
Green materials contain nitrogen and moisture. Common examples include:
- Fruit scraps
- Vegetable peelings
- Coffee grounds
- Tea leaves
- Fresh plant cuttings
- Wilted flowers
These ingredients help decomposition, but adding too many at once can make the bin wet, dense, and smelly.
A common beginner mistake is filling the compost bin with kitchen scraps while adding only a small amount of paper or leaves. This creates a heavy mixture that quickly loses airflow.
Not Enough Brown Materials
Brown materials provide carbon, create structure, and absorb excess moisture. They include:
- Shredded cardboard
- Torn paper
- Dry leaves
- Paper egg cartons
- Untreated sawdust
- Small dry twigs
- Coconut coir
Brown materials are particularly important for balcony composting because apartment households often produce more food scraps than garden waste.
Keep a separate bag or box of shredded cardboard near your compost bin. Every time you add kitchen scraps, cover them with a generous handful of dry browns.
Excess Moisture
A balcony compost bin should feel similar to a wrung-out sponge. It should be slightly damp but should not drip when squeezed.
Moisture can build up from:
- Water-rich fruit scraps
- Rain entering the container
- Poor drainage
- Too many coffee grounds
- Large amounts of cooked vegetables
- A lack of absorbent brown material
A wet compost bin often develops a musty or rotten smell. Cornell’s compost guidance notes that musty odours may indicate excessive moisture, while ammonia smells can indicate too much nitrogen. Adding a porous carbon-rich material and restoring airflow can correct both problems.
Insufficient Airflow
Even a perfectly balanced compost mixture can smell if it becomes compressed. Air must be able to move between the materials.
Small scraps, coffee grounds, and wet food can form a dense layer. Mixing in shredded cardboard, dry leaves, or small twigs creates tiny air pockets inside the compost.
Turning the mixture regularly also prevents compaction.
Choosing the Best Composting Method for a Balcony
There is no single composting system that works for every apartment. Your best option depends on your available space, local climate, the amount of kitchen waste you produce, and how much maintenance you are willing to do.
Before setting up your bin, plan where it will sit. You can also explore practical DIY patio makeover projects to organise a compact outdoor area without sacrificing seating or plant space.
Traditional Aerobic Compost Bin
A small aerobic bin is one of the simplest options for a covered balcony.
Choose a plastic or wooden container with:
- A secure lid
- Small ventilation holes
- Drainage holes near the bottom
- A removable tray underneath
- Enough room for mixing
A container between 40 and 80 litres is often manageable for a small household. Avoid choosing an extremely small container because the materials may become compressed quickly.
Place the container on blocks or a small stand so air can circulate underneath it. Keep a waterproof tray beneath it to catch accidental moisture.
Compost Tumbler
A compact tumbler is useful when you want easy mixing. Instead of using a garden fork, you rotate the container to introduce air.
Tumblers are generally clean and enclosed, making them suitable for balconies. However, they can become heavy when full and may require more floor space than a standard bin.
Before purchasing one, check:
- Its fully assembled dimensions
- The weight it can support
- Whether your balcony floor is level
- Whether you have enough room to rotate it
- Whether liquid can drain safely
Worm Composting
Worm composting, also called vermicomposting, uses composting worms to process food scraps.
A worm bin can work well in a shaded balcony corner because it is compact and relatively quiet. When properly managed, it should smell like damp soil.
Worms can usually process:
- Fruit and vegetable scraps
- Coffee grounds
- Tea leaves
- Crushed eggshells
- Small amounts of plain grain-based food
Avoid overfeeding the worms. Uneaten food can rot before the worms process it, producing odours and attracting flies.
Worm bins also require protection from extreme heat, direct sunlight, freezing temperatures, and heavy rain.
Bokashi Composting
Bokashi is a fermentation method that uses beneficial microorganisms in an airtight bucket. It can process a broader range of food waste than traditional balcony composting, including some cooked food.
However, bokashi material is fermented rather than fully composted. Once the bucket has finished fermenting, the contents usually need to be buried in soil, added to another composting system, or delivered to a community composting location.
It may be convenient for apartment residents who have access to large planters, community gardens, or compost collection services.
What You Need for Odor-Free Balcony Composting
You do not need expensive equipment to start. A simple setup requires:
- A ventilated bin with a secure lid
- A waterproof tray
- A container for kitchen scraps
- A supply of dry brown materials
- A hand fork or compost aerator
- Gardening gloves
- A small scoop or measuring container
You may also want a piece of mesh to cover ventilation openings. This improves airflow while making it more difficult for insects to enter.
Store your brown materials in a dry box beside the compost bin. Having them nearby makes it much easier to cover food scraps immediately.
For more small-space home and gardening inspiration, browse ZingyZon before arranging your balcony setup.
How to Start Balcony Composting Without Smell
Follow this process carefully during the first few weeks. Establishing the correct balance at the beginning makes future maintenance much easier.
Step 1: Select a Shaded, Ventilated Location
Place the bin somewhere protected from heavy rain and intense afternoon sun.
Constant direct sunlight can overheat the container and dry the outside while leaving the centre wet. Rain entering through ventilation holes can create excess moisture.
A shaded corner with gentle airflow is usually ideal. Do not place the bin directly against your balcony door, outdoor seating, or air-conditioning unit.
Step 2: Create a Dry Base Layer
Begin with a 10 to 15-centimetre layer of coarse brown material.
Suitable options include:
- Dry leaves
- Torn cardboard
- Shredded egg cartons
- Small twigs
- Coconut coir
- Untreated wood shavings
This base layer absorbs moisture and prevents wet food from collecting at the bottom.
Avoid starting with soil alone. Soil can become dense and block drainage, while coarse brown material creates better airflow.
Step 3: Add a Small Amount of Kitchen Scraps
Add a thin layer of fruit and vegetable scraps. Cut large scraps into smaller pieces before adding them.
Smaller pieces have more exposed surface area and normally break down more evenly. However, avoid blending food into a wet paste because this can compact the compost.
For your first addition, use only a small bowl of scraps rather than emptying several days of waste into the bin.
Step 4: Cover the Scraps Completely
This is one of the most important steps in balcony composting without smell.
Cover the kitchen waste with at least two or three times its volume in dry brown material. No visible food should remain on the surface.
A thick cover layer:
- Absorbs moisture
- Reduces odour
- Creates airflow
- Discourages fruit flies
- Prevents food from being exposed to birds
Keep shredded cardboard ready so you never have to leave food uncovered.
Step 5: Check the Moisture
Take a handful of compost while wearing gloves and gently squeeze it.
The mixture should hold together slightly without releasing water. Add more shredded cardboard if it drips or feels slimy.
When the material is extremely dry and dusty, sprinkle a very small amount of water over it. Add water gradually because it is easier to moisten dry compost than to rescue a soaked bin.
Step 6: Mix the Compost Regularly
Gently mix the upper and middle layers every three to seven days.
You do not need to turn the entire container every day. Excessive disturbance can make the process inconvenient, particularly in a worm bin.
For a standard aerobic bin, regular mixing:
- Introduces oxygen
- Breaks up compacted layers
- Distributes moisture
- Combines greens and browns
- Helps you detect problems early
Singapore’s National Parks gardening guidance recommends maintaining a higher proportion of browns and mixing immature compost regularly to keep it aerated.
Step 7: Stop Adding Waste When the Bin Is Nearly Full
Do not pack food into every available space. Compost needs empty spaces between ingredients so oxygen can circulate.
When the bin is around three-quarters full, stop adding fresh waste and allow the contents to mature.
You can start a second container or temporarily store suitable scraps in a sealed container in the freezer.
Best Materials for Balcony Compost
Successful composting depends more on ingredient balance than on specialised equipment.
Green Materials to Add
Use these in moderate quantities:
- Vegetable peelings
- Fruit scraps
- Coffee grounds
- Loose tea leaves
- Crushed eggshells
- Wilted flowers
- Soft plant trimmings
- Small amounts of fresh grass
- Plain leftover rice in very limited quantities
Drain watery food scraps before placing them in the bin.
Citrus peel and onion scraps can be composted in small amounts in a traditional bin, but large quantities may slow worm activity in a vermicomposting system.
Brown Materials to Add
Keep plenty of these available:
- Plain cardboard
- Paper egg cartons
- Toilet-paper tubes
- Dry leaves
- Brown paper bags
- Non-glossy paper
- Untreated sawdust
- Wood shavings
- Small twigs
- Dried plant stems
- Coconut coir
Remove plastic tape, labels, staples, and glossy coatings before shredding cardboard.
Materials to Avoid
Do not place the following items in a small traditional balcony compost bin:
- Meat
- Fish
- Bones
- Dairy products
- Cooking oil
- Greasy food
- Sauces
- Pet waste
- Diseased plants
- Glossy paper
- Treated wood
- Plastic-labelled tea bags
- Compostable packaging unless your system can process it
Small home compost systems may not reach temperatures high enough to break down meat, dairy, bones, and certain compostable products safely or effectively. These materials are also more likely to create odours and attract pests.
How to Prevent Fruit Flies and Other Pests
Fruit flies usually appear because food scraps are exposed or the bin is too wet.
Prevent them by following these habits:
- Bury fresh scraps below the existing compost.
- Cover every addition with shredded cardboard.
- Wipe food residue from the lid and rim.
- Keep ventilation holes covered with fine mesh.
- Freeze scraps before adding them.
- Avoid overfilling the container.
- Do not add rotten fruit in large quantities.
- Keep the floor and tray clean.
Freezing kitchen scraps can kill many insect eggs that may already be present on fruit skins. It also allows you to collect a controlled quantity before adding it to the compost.
When you add frozen scraps, allow excess ice to drain first so it does not increase moisture in the bin.
Troubleshooting a Smelly Balcony Compost Bin
Most compost problems can be corrected without throwing everything away.
Rotten-Egg or Sewage Smell
Likely cause: Insufficient oxygen or excessive moisture.
Solution:
- Stop adding food.
- Mix the contents thoroughly.
- Add shredded cardboard and dry leaves.
- Clear blocked drainage holes.
- Leave the lid slightly open for a short period when pests cannot enter.
- Resume feeding only after the smell improves.
Strong Ammonia Smell
Likely cause: Too many nitrogen-rich green ingredients.
Solution:
- Add a generous amount of brown material.
- Mix the contents.
- Avoid adding coffee grounds and fresh scraps for several days.
- Check that the mixture is not overly wet.
Sour or Fermented Smell
Likely cause: Large food pieces, overfeeding, or compacted layers.
Solution:
- Break apart dense areas.
- Add coarse cardboard or twigs.
- Reduce the amount of food added each week.
- Chop future scraps into smaller pieces.
- Keep fresh waste buried.
Compost Is Wet and Slimy
Likely cause: Excess moisture and not enough structure.
Solution:
- Add dry cardboard, leaves, or coir.
- Mix thoroughly.
- Improve drainage.
- Protect the container from rain.
- Avoid adding watermelon, melon, and other watery scraps for a few days.
Compost Is Dry and Not Decomposing
Likely cause: Insufficient moisture, too many browns, or pieces that are too large.
Solution:
- Add a small amount of green material.
- Sprinkle water lightly.
- Cut large cardboard and plant pieces.
- Mix the contents.
- Move the bin away from intense sunlight.
Maggots Appear
Maggots often indicate that flies reached exposed food. Although they contribute to decomposition, most balcony composters do not want them.
Cover the surface with several centimetres of dry material, clean the lid, and inspect openings for gaps.
Do not use pesticides inside the compost because residues may remain in the finished material.
How Long Does Balcony Compost Take?
The composting time depends on:
- Temperature
- Ingredient size
- Moisture
- Airflow
- Material balance
- Frequency of mixing
- Type of composting system
A carefully managed aerobic bin may produce usable compost within a few months. A cooler or less frequently maintained container may take considerably longer.
Finished compost should:
- Look dark and crumbly
- Smell earthy
- Feel cool
- Contain few recognisable food scraps
- No longer generate excess moisture
- Have a loose, soil-like texture
Do not use immature compost directly around sensitive seedlings. Partially decomposed food can continue changing inside the pot and may temporarily compete with plants for nutrients.
How to Use Finished Compost on a Balcony
Finished compost is concentrated organic material, so it is usually better mixed with other growing media rather than used alone.
Mix It into Potting Soil
Combine one part finished compost with three or four parts suitable potting mix.
This works well when refreshing containers for:
- Herbs
- Leafy vegetables
- Flowers
- Small fruiting plants
- Decorative balcony plants
Use It as a Top Dressing
Spread a thin layer over existing potting soil and gently mix it into the upper surface.
Keep the compost away from direct contact with delicate stems.
Make Compost-Enriched Planter Mix
For a simple container mix, combine:
- Finished compost
- Potting soil
- Coco coir
- Perlite or another drainage material
Adjust the mixture according to the type of plant you are growing.
Refresh Your Balcony Garden
Compost can support a wider balcony improvement project involving plants, seating, lighting, and practical storage. These patio decorating ideas for summer can help you create an outdoor area that remains attractive while accommodating a discreet composting corner.
Simple Weekly Balcony Composting Routine
A consistent routine prevents most problems.
After Preparing Food
Collect suitable fruit and vegetable scraps in a small sealed container. Drain excess liquid and remove stickers.
Two or Three Times Per Week
Add the scraps to the centre of the bin and immediately cover them with brown material.
Avoid adding a full week of scraps in one large layer.
Once Per Week
Check:
- Smell
- Moisture
- Airflow
- Insects
- Drainage
- Remaining brown material
Mix the compost gently and clean any liquid from the tray.
Once Per Month
Inspect the bin for:
- Cracks
- Blocked holes
- Loose mesh
- Leaks
- Compacted bottom layers
Restock shredded cardboard and dry leaves before you run out.
Common Balcony Composting Mistakes
Using a Completely Sealed Container
Traditional aerobic compost needs ventilation. A tightly sealed plastic box can quickly become anaerobic unless you are intentionally using the bokashi method.
Adding Food Without Covering It
Visible food attracts insects and releases odour directly into the air.
Treating Paper as an Optional Ingredient
Brown material is not just filler. It balances nitrogen, absorbs moisture, and creates structure.
Pouring Compost Liquid onto Plants
Liquid collected from an overly wet aerobic bin may not be finished fertiliser. It can contain unstable compounds and should not automatically be applied to plants.
Correct the moisture problem instead of relying on the drainage liquid.
Adding More Waste Than the System Can Process
A small bin has limited capacity. Reduce the volume of waste by chopping scraps, using community collection, or running two containers in rotation.
Ignoring the First Bad Smell
A mild odour is easier to correct than a severely compacted, waterlogged bin. Add browns and air as soon as the smell changes.
Frequently Asked Questions
Does balcony composting attract rats?
A properly secured bin containing only suitable plant-based scraps is less likely to attract rats. Use a strong lid, cover ventilation holes with mesh, clean spills, and avoid meat, fish, dairy, oil, and cooked food.
Should balcony compost have holes?
A traditional aerobic bin needs small ventilation and drainage holes. Cover the openings with fine mesh to improve airflow while reducing insect access.
Bokashi buckets are different because they are designed to remain airtight.
Can I add soil to my balcony compost?
You can add a small handful of healthy garden soil or mature compost to introduce microorganisms, but it is not essential. Avoid adding thick soil layers because they may compact the bin.
Can I compost bread on a balcony?
Small amounts of plain bread can break down, but bread may attract pests and become mouldy. Beginners are usually better avoiding it until they have a stable, well-balanced system.
Why does my compost smell after rain?
Rain may have entered the container and filled the air spaces with water. Add dry brown material, mix the compost, clear drainage holes, and move the container under cover.
Can compost be kept in direct sunlight?
Gentle morning sunlight may be acceptable, but intense direct sun can overheat a plastic container and dry it unevenly. A shaded, well-ventilated position is usually easier to manage.
Can I compost during winter?
Yes, although decomposition may slow in colder weather. Insulate the container, add smaller pieces, maintain moisture, and avoid overloading it with fresh food.
What should healthy compost smell like?
Healthy compost should have a mild, earthy smell similar to damp soil or fallen leaves. Strong ammonia, sour, sewage-like, or rotten-egg smells indicate that the mixture needs adjustment.
Final Thoughts
Balcony composting without smell is possible when you manage four basic elements: brown material, green material, moisture, and oxygen.
Start with a manageable container, keep a large supply of shredded cardboard, and add kitchen scraps in small quantities. Cover every fresh addition, check the moisture weekly, and mix the contents before they become compacted.
You do not need a large garden or expensive equipment. A clean corner of your balcony can turn fruit peels, vegetable trimmings, coffee grounds, and dry paper into valuable compost for pots and planters.
The most important habit is responding early. When the bin becomes wet, add browns. When it smells, add air. When food remains visible, cover it. These simple adjustments will help keep your compost productive, discreet, and neighbour-friendly.

Keep Exploring Zingyzon.com
Read more Zingyzon SEO, digital marketing, online earning, business, and technology guides for Australia, USA, and global readers.