
How to Braze Copper: A Complete Beginner-Friendly Guide
Brazing copper can feel intimidating when you first start. Maybe your joints are weak, the filler isn’t flowing, or the […]
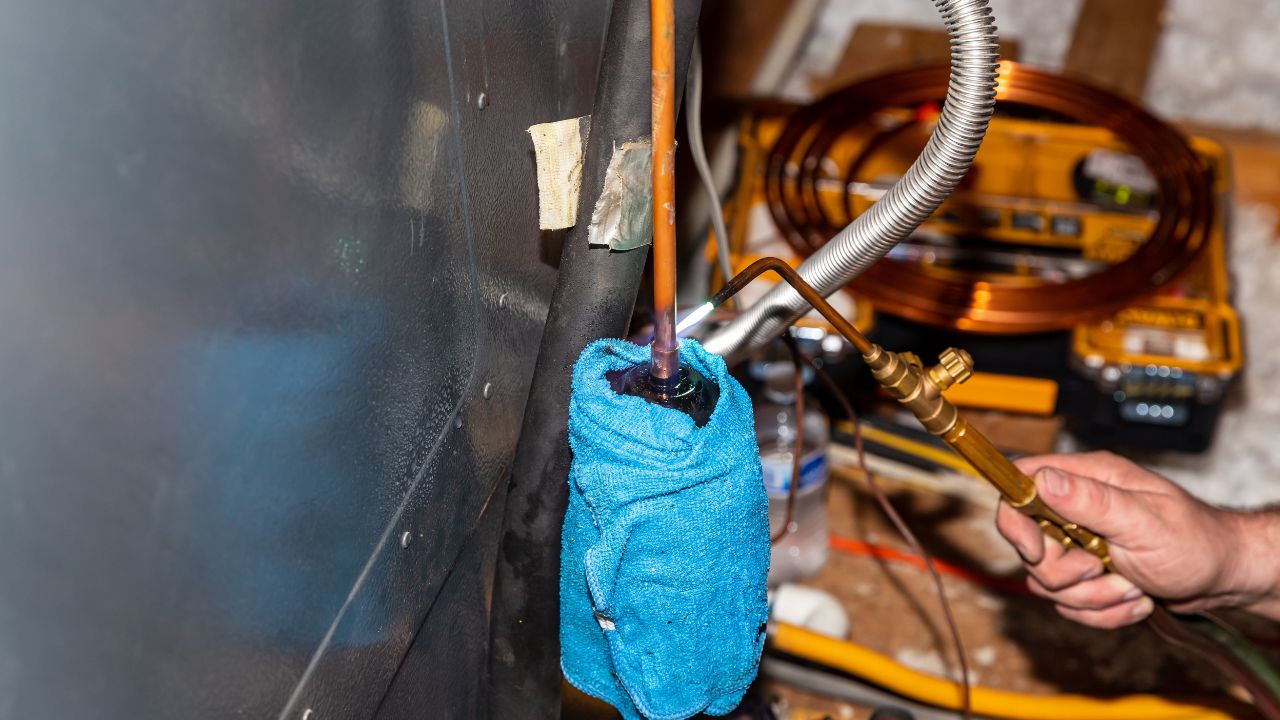
Brazing copper can feel intimidating when you first start. Maybe your joints are weak, the filler isn’t flowing, or the metal ends up burnt instead of smooth. The good news is that brazing becomes much easier when you understand the basics and follow the right techniques.
This guide explains everything you need to know to braze copper properly, from preparation and heating to common mistakes and post-cleaning steps.
Understanding the Basics of Copper Brazing
Brazing copper is the process of joining two copper pieces using a filler metal that melts at a lower temperature than copper. The filler flows into the joint and bonds the pieces as it cools.
How Brazing Works
- A torch heats the copper pieces.
- When the temperature is right, the filler metal melts and flows into the joint.
- As the filler cools, it forms a strong, leak-proof bond.
- Proper temperature control is essential. Overheating can burn the copper or damage the filler.
Ideal Joint Gap
A gap between 0.001 and 0.005 inches allows the filler to flow properly.
Where Copper Brazing is Used
Copper brazing is common in:
- Plumbing
- HVAC systems
- Electrical components
- Mechanical repairs
How Brazing Differs From Welding
- Welding melts the base metals.
- Brazing melts only the filler metal.
- Brazing keeps copper strong and avoids warping.
- Compared to soldering, brazing creates much stronger joints because of higher temperatures.
Tools and Safety Equipment You Need
Preparing the right tools ensures cleaner, faster, and safer results.
Essential tools:
- Propane or acetylene torch
- Brazing rods (filler metal)
- Flux for cleaning and preventing oxidation
- Cleaning brushes or abrasive pads
- Tube cutters or hacksaws
- Heat-resistant work surface
- Protective gloves
- Safety glasses or face shield
- Cotton clothing (not synthetic)
- Ventilation fan
- Fire extinguisher
Preparing Copper Surfaces Before Brazing
Good preparation leads to strong, clean joints.
Steps to Prepare Copper
Clean the metal
Remove dirt, grease, or oil using a degreasing cloth or methanol.
Remove oxidation
Use:
- Wire brush
- Emery cloth
- Abrasive pads
Polish until the copper is clean and shiny.
Fit the joint correctly
Leave a small, even gap so the filler can flow smoothly.
Apply flux
Flux prevents oxidation and allows the filler to spread evenly. Apply it immediately after cleaning.
Keep surfaces dry
Moisture can prevent proper bonding and create voids.
you can also check out our guide : How to Remove Kitchen Kickboards: Step-by-Step Guide
Choosing the Right Filler Metal and Flux
The correct filler and flux determine the strength and quality of your joint.
Common Filler Metal Options
Silver alloys
- Strong joints
- Excellent flow
- Good for leak-free seals
Phosphorus-copper alloys
- Used for copper-to-copper joints
- Often do not need flux
Brass (copper-zinc alloys)
- Lower-cost option
- Requires flux
Check Melting Temperature
The filler must melt below the temperature of the copper to avoid damaging the base metals.
Flux Selection
Choose flux based on filler metal and working temperature:
- General-purpose flux
- High-temperature flux for tough jobs
Always use clean, uncontaminated rods and flux.
Heating Techniques and the Brazing Process
Different heating methods are used depending on the job size.
Common Heating Methods
- Torch brazing: Ideal for small projects and repairs
- Furnace brazing: Good for large production
- Induction brazing: Fast, precise, and automated
- Resistance brazing: Good for conductive metals and simple joints
The Brazing Process
- Clean and flux the joint.
- Heat the copper evenly, not just the filler.
- When the temperature is correct, the filler will flow into the joint naturally.
- Allow the filler to be drawn in by capillary action.
- Let the joint cool without disturbance.
Controlling heat is crucial. Uneven heating leads to weak or incomplete joints.
Cooling and Post-Brazing Cleanup
Proper cooling is essential for strong joints.
Cooling
Let the copper cool slowly in the air.
Rapid cooling (like dipping in water) causes cracks and weakens the bond.
Cleaning After Brazing
Flux forms a glassy residue after heating. Leaving it on can cause corrosion.
To clean it:
- Soak the joint in warm water.
- Scrub with a wire brush.
- Use a vinegar-water solution for stubborn residue.
- Dry the copper fully.
Common Brazing Mistakes to Avoid
- Not cleaning the metal properly
- Using the wrong flux
- Overheating the copper
- Holding the filler directly in the flame
- Choosing the wrong filler metal
- Moving the joint before it cools
- Ignoring safety gear
- Not inspecting the final joint
- Cooling the joint too quickly
Avoiding these mistakes ensures stronger, cleaner, and longer-lasting joints.
Example: SANHUAN Copper Brazing Alloys
(This section rewritten clearly without promotions or links.)
SANHUAN provides several copper-phosphorus alloy options designed for different joint sizes and applications. These alloys are commonly used in HVAC, plumbing, and electrical components for strong and durable connections.
Examples:
- SCuP-2: Ductile, suitable for medium-gap joints.
- SCuP-3: Good flow and ductility for larger gaps.
- SCuP-5Sn: Low-melting alloy for water heaters and sanitary appliances.
- SCuP-6Sn & SCuP-7Sn: Used in heating devices and sanitary fittings.
These alloys offer good flowability, strong bonding, and reliable performance for copper and brass components.
Conclusion
Brazing copper may seem difficult at first, but with the right tools, preparation, and technique, it becomes a straightforward and reliable process. Whether you’re repairing plumbing, working on HVAC systems, or handling small DIY projects, proper brazing ensures strong, clean, and long-lasting joints.
Learning the fundamentals and practicing consistently will help you achieve professional-quality results every time.

Keep Exploring Zingyzon.com
Read more Zingyzon SEO, digital marketing, online earning, business, and technology guides for Australia, USA, and global readers.